
When the Steadicam operator walks on set and starts setting up their gear, it can look pretty impressive. Here’s this guy or gal with cases of specialized equipment that looks like it belongs to Robocop.
Or maybe Alien.

Contrary to this picture, Steadicams are not all that great at eradicating alien threats.
So what part is the Steadicam?
Ah, not an easy answer actually.
I’ve worked with a number of newer directors, and there’s a bit of a learning curve I often have to help with there. Sometimes I’m asked “So you have a Steadicam? What camera is on there?” And I answer, cautiously, “Whatever camera you want within the weight limit.” But then I figured out…some folks don’t know the camera is actually not part of the Steadicam. The Steadicam is the device that moves the camera around. It’s a dolly if it had feet and shock absorbers instead of wheels and rails. It’s a tripod with an ego. And it’s also not those things.
The Steadicam mainly consists of 3 major components: The Sled, The Vest and the Arm.

Pictured are parts of the Steadicam M-2.
Sled
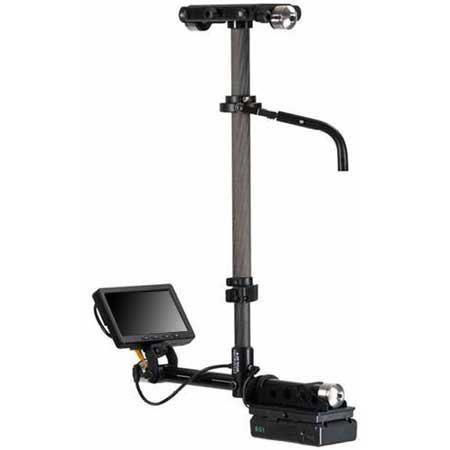
Pictured is a Steadicam Pilot, a smaller rig for DSLR sized cameras.
The Sled is the post you see here. The camera is mounted on top, there’s a monitor at the bottom, and batteries power everything from the bottom. This is where the electronics live. There’s wires inside that travel from the top of the top stage to the very bottom where the batteries and monitor reside.
Arm

Pictured is a G-70x arm. This arm can handle 13-70lbs of weight.
The arm is really where a lot of the magic happens. The arm has sections and springs that compress or expand to lift or lower the rig with ease. The arm also isolates movement, taking away the natural bounce of a human’s walk and translating it into smooth moving video.
Vest


Two types of vests pictured above: A Fawcett Exovest and a GPI Pro vest. There are several varieties.
The Vest is where this contraption connects to a human body. The vest takes the weight and distributes it across the body. They are quite adjustable. Only in certain cases will an operator need to get a specific type of vest, due to small size or even just preference.
Let’s take a look at the top of the sled

Here’s an example of the top stage (top platform where the camera ends up being mounted). There’s a plate that goes on the very top that you screw the camera into. Adjustment knobs on the sides move that plate either left and right or front and back. This will serve in helping balance the camera.

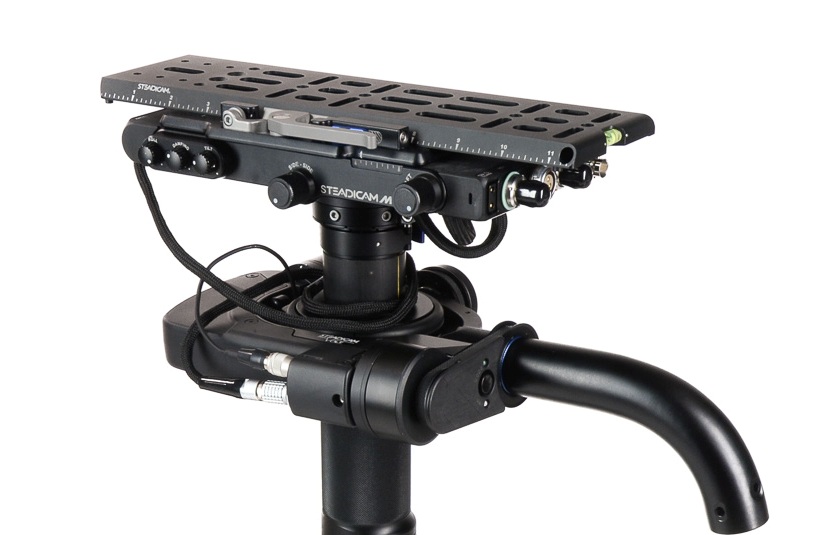
Also on the top stage are all sorts of places to plug in wires! Several of these inputs are to get power from the battery at the bottom into the camera or to power the accessories. Why not just leave a battery on the camera when you put it up there? Well, you can, but anything you put on the Steadicam will add more weight. Sometimes, you gotta remove as much weight as possible.
You can also see the SDI inputs (pictured right, at the short end of that top stage). This is how you get the video feed from the camera to the monitor at the bottom of the sled.
The Gimbal

This is the handle that sticks out from the sled post and connects to the arm.
The gimbal is 3-axis, meaning it moves freely in three directions for pans, tilts and roll. The gimbal handle that connects to the arm is where the right hand goes, and the handgrip below on the post itself is where the left hand goes. This can be reversed for left-handed users who operate “goofy footed.”
Other Accessories
Plenty of other accessories and mounting devices enable the Steadicam operator to work in different conditions. There are mounts so they can operate from a car, more advanced gimbal technology in the form of the Volt, and things like rickshaws and the Trinity to change the possibilities of what operating can offer.
But this is an intro series and you’ll have to dig into all that when you decide you want to learn more.
Part 3: Balancing and Operating, is coming next.

One thought on “Steadicam 101: What Components Make a Steadicam”