
Recently I was invited to help teach cinematography on a budget for my local library’s film maker club. I figured, why not share the love here?
So, congrats — you’re embarking on your first or fortieth short film production. Unfortunately, you don’t have much money to put into it. How can you personally go cheap without sacrificing all your production value?
In this Medium post, Lance Adams figures short films cost approximately $500-1000 per minute. That’s a lotta moolah.
Keep in mind, if you’re producing your short film, you need to budget money for food and snacks for your crew, props, locations, equipment, crew, actors, gas money, etc. There’s a lot of costs associated with even the cheapest of short films.
For the sake of this blog post, we’re going to look strictly at the cinematography side. Maybe a friend has asked you to be the DP on their short film, or maybe you’re trying to do your own film on the cheap. Here are some choices that will have less of an impact on your bottom line.
Shooting a Budget Friendly Script
Aim for a short script (emphasis on short, 5-10 pages max) that has few actors, few locations, and even less in the way of special or visual effects. Less is more in this case, and limiting yourself with these parameters will make it more likely that you succeed in shooting this short film on a tiny budget.
The Camera

Oh, so you want to shoot your short film on a RED Gemini 5K? That’s nice. That’ll also be around $1200/day. Without a lens.
I recommend shooting on smaller, more compact cameras for the no-budget short. DSLR’s are highly popular, but if you have access to a Blackmagic –that’s cool too. If you don’t have a DSLR, they’re a fairly cheap rental on a service like Sharegrid. For a good comparison, a Panasonic GH5 (DSLR) is about $80 to rent…per week ( via LensRentals.com). Big difference from that RED, huh?
There’s quite a few people out there doing some cool things with their iPhones too. For that type of shooting, download the app Filmic Pro (available for iOS or Andriod). It’s $15 and from what I hear, well worth the money. The app gives you full manual controls over your phone’s camera, enhancing your ability to shoot more cinematically.
Use What You Have
Lay out all the equipment you have right now. Camera, lenses, accessories, lighting. This is where you’ll start. Don’t have pro video gear? Start getting creative. Your household lamps can double as practical lighting in that bedroom scene. That tripod could turn into a dolly if you put it on wheels.
I’ve been asked a couple times how I achieved a particular “dolly” shot inside of a car. There was no room for a dolly or a slider for that matter, so I placed my Sony A7s camera on a roll of duct tape I had in the car and pushed it on the center console to get a nice dolly effect on the back seat of the car. Get creative!*
*Safely, of course.
Lighting Options

You better light those scenes so you can see what’s going on! Bad lighting will ruin good cinematography.
Earlier I mentioned “practicals,” which in this case would be lights that exist in the world of your film. That might be a lamp in a bedroom scene or the ceiling fixture in a kitchen. That’s a good start but you’re probably going to want to work a little more light in, or creatively block light for some “negative fill.”

As far as inexpensive, semi-professional lighting is concerned, I’d say invest in a couple of reasonably priced LED panels.
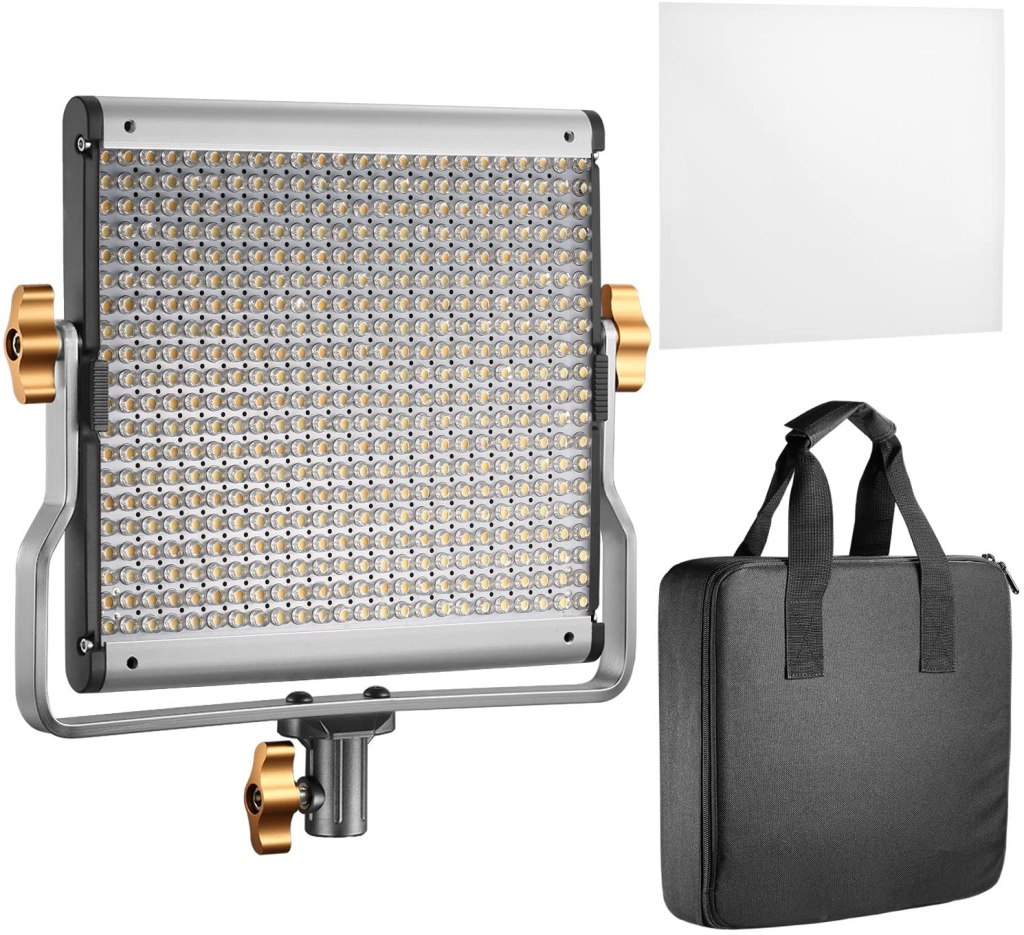
These LED light panels can be found on Amazon.
I bought two Neewer 480s and one 660 (pictured above) from Amazon, and I’ve used them on multiple film shoots. Lightweight, dimmable and ranging in color temp from 3200 to 5600K, these light panels are a life saver.
I also have a few of these itty bitty LED lights that might be meant for product photography, but have come in handy in a pinch when a large light can’t fit somewhere.
Manipulate your lights with gels (if not color-adjustable already) and use bounce and reflectors to direct the light where it needs to go. Use dark fabric such as duvetyne or something way cheaper to eliminate light where you don’t need it.
I could go more in depth on the practical ways to light or shoot on the cheap, but I think you get the idea. If there’s anything you’d like me to explore further in a future blog post — just let me know! I’m happy to help.
In the meantime, check out this YouTube playlist I made of tips/tricks for doing cinematography on the cheap:
